Get Started
Part 1: Pre-Requisites
Enable SandboxMode
To fully test the Playtime SDK integration and access all campaign types, configure your application to be in "SandboxMode". Contact your Account Manager to have this setting enabled for your environment.
Troubleshooting: If you do not see any apps returned or if you run into any errors after this setting is enabled, please try a fresh install.
Install the dependency
Follow these steps to integrate the adjoe React Native module into your project:
Open your project's
package.jsonfile.Add the adjoe as a dependency under the
dependenciessection. You can change the version number to the desired version of adjoe SDK you want to integrate.
dependencies: {
  "react-native-adjoe-sdk": "https://github.com/adjoeio/adjoe-react-native-sdk#v4.1.1"
}
Alternatively, you can use your project's package managers to perform the installation:
npm install --save https://github.com/adjoeio/adjoe-react-native-sdk#4.1.1yarn add https://github.com/adjoeio/adjoe-react-native-sdk#4.1.1
The package doesn't support Expo by default. To install it in an Expo project, see the official documentation on installing third-party packages.
iOS: Add the Native Dependency
CocoaPods is a dependency manager for Cocoa projects. For usage and installation instructions, visit their website.
In your project directory, create a
Podfileif one doesn’t already exist.Inside the
Podfile, add the following configuration to include the Playtime SDK as a dependency within your app’s target. You can also specify a version or version range—see the CocoaPods Podfile syntax reference for more details.Copy
source 'https://github.com/adjoeio/PlaytimeSpecExternal.git'

platform :ios, '14.0'

target 'MyApp' do
  use_frameworks!

  pod 'PlaytimeMonetize', '~> 4.1.1'
end
Open a terminal and navigate to your project’s root directory.
Run the following command to update the CocoaPods repository and install the dependencies:
Copy
pod install --repo-updateOnce installation is complete, open the
.xcworkspacefile generated by CocoaPods. The Playtime SDK will now be available for use within your project.
Check out our troubleshooting guide if you run into any issues with Cocoapods
Android: Add the Native Dependency
Add adjoe's repository to your root
build.gradle(project level):
allprojects {
    repositories {
        ...
        maven {
            url  "https://releases.adjoe.io/maven"
        }
    }
}
Add the adjoe dependency to your app's
build.gradle(module level):
dependencies {
    ...
    implementation 'io.adjoe:adjoe-sdk-android:4.1.1'
}
If you use Kotlin DSL for adding dependencies, add the repo in the settings.gradle.kts
repositoriesMode.set(RepositoriesMode.FAIL_ON_PROJECT_REPOS)
    repositories {
        google()
        mavenCentral()
        maven { url = uri("https://releases.adjoe.io/maven") }
    }
}
Add adjoe's repository to the
settings.gradlefile:
2. Add the adjoe dependency to your app's build.gradle (module level):
Part 2: App Attest Integration (iOS Only)
The Playtime SDK for iOS makes use of Apple's DeviceCheck APIs to ensure that the app is launched on a real device and that there haven't been any malicious alterations. This allows us to better protect your app and your revenues.
To ensure that the SDK runs as expected, you must complete the following steps, even if the app builds normally. Failure to complete a step could cause the app to disfunction or be rejected from the App Store. You can read more about the App Attest service here.
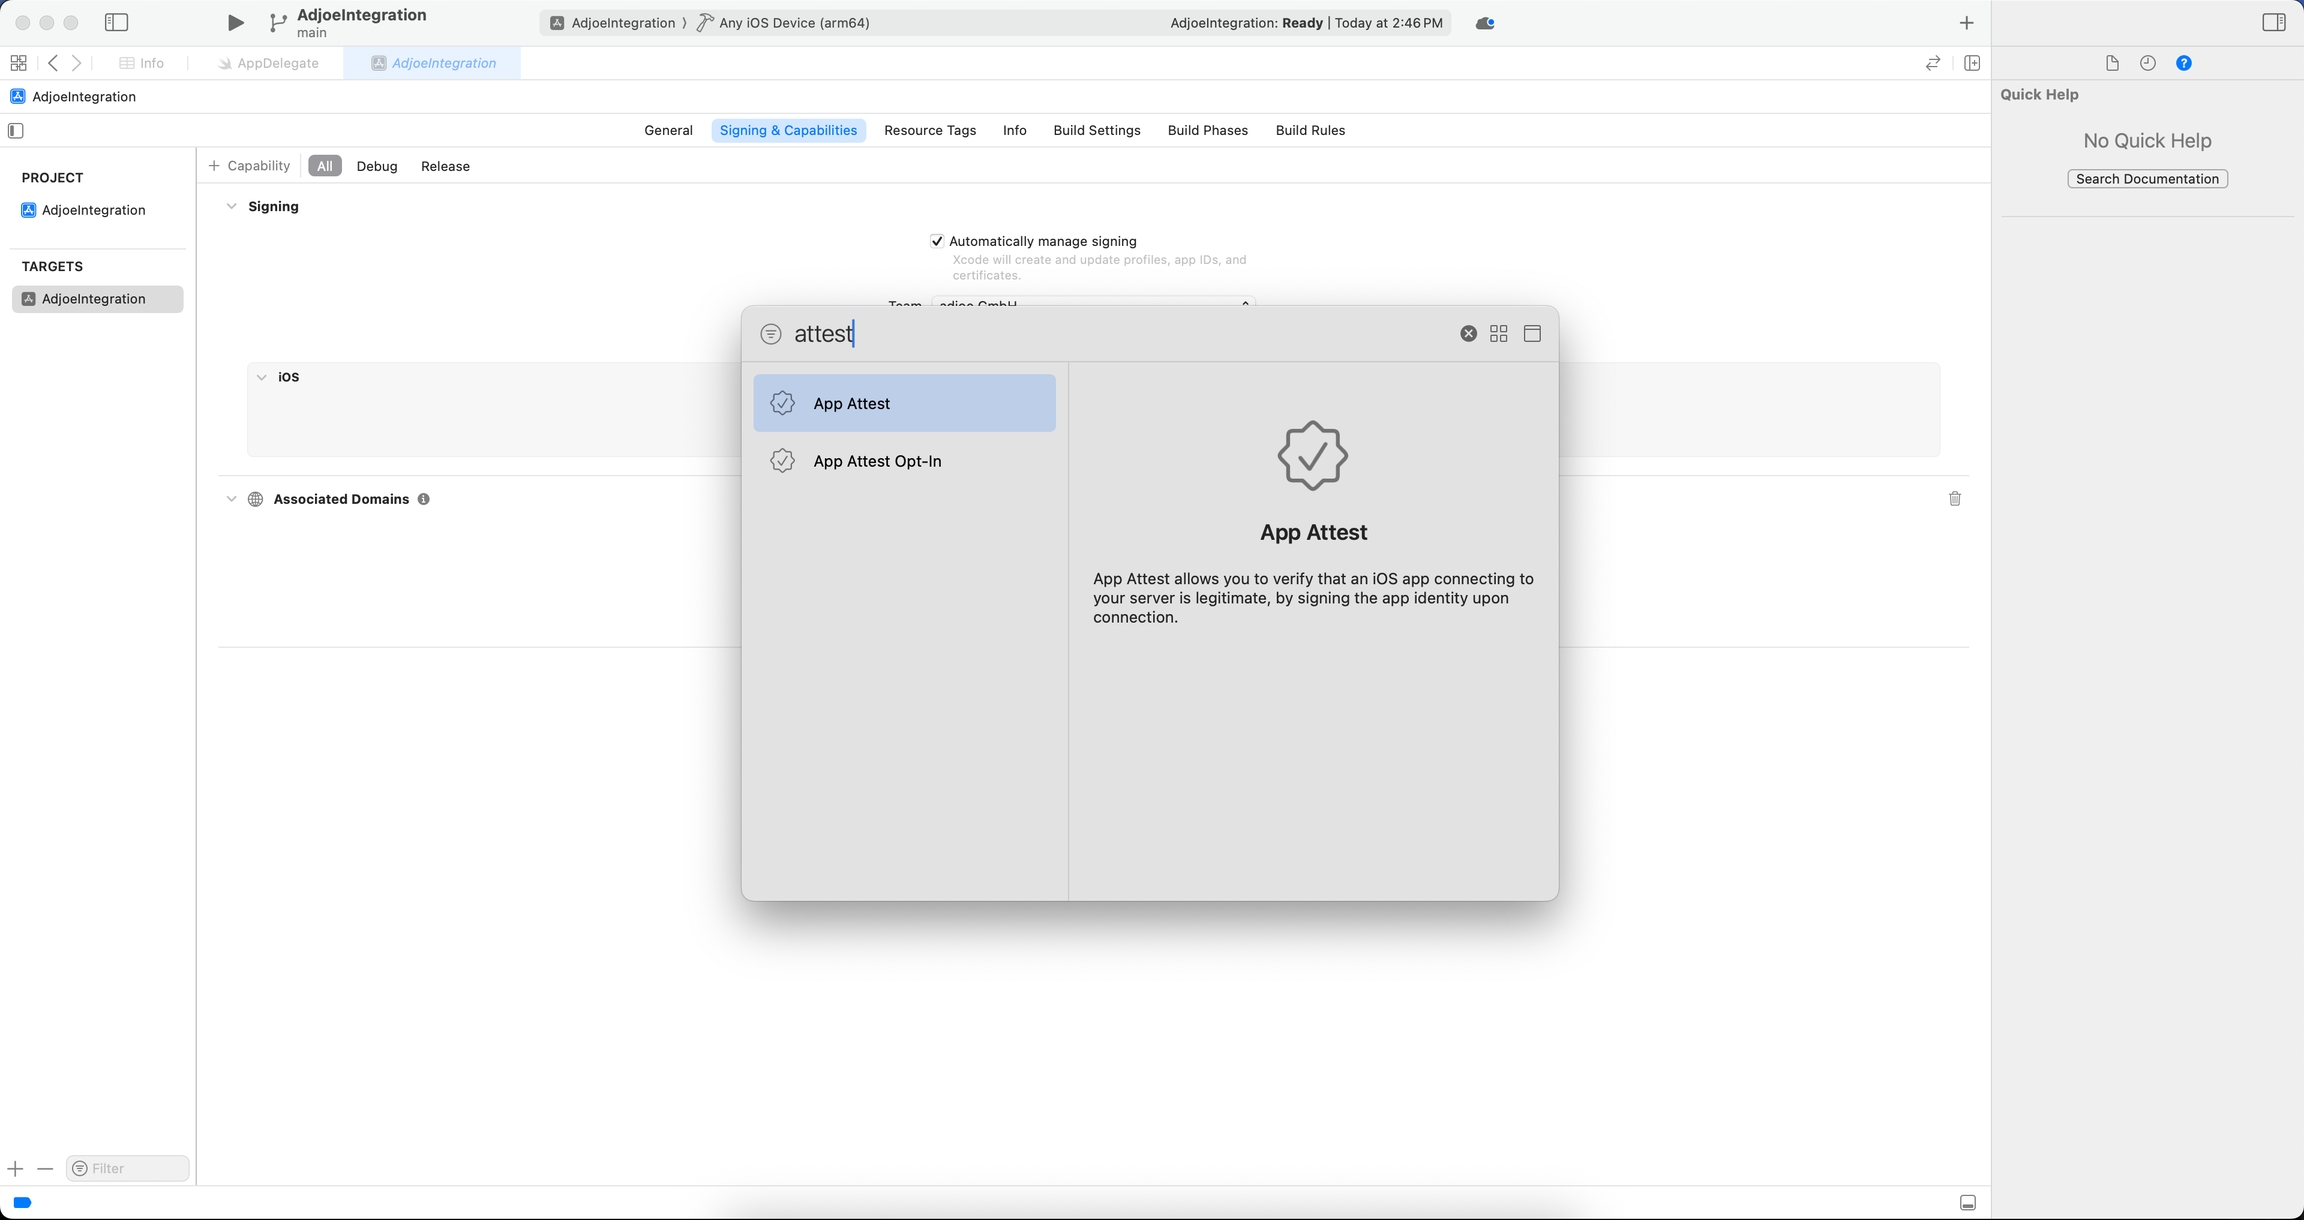
Enable App Attest
Select your app ID
Ensure App Attest is enabled under Capabilities

Gather Credentials:
In order for adjoe's services to work with your app, the following credentials will need to be enabled for your app. They can be uploaded at the app-level in the Monetize Dashabord.
If you plan on using a dev and a prod environment, you will need to make sure distinct credentials are added for both app bundles, e.g., playtime.app.dev and playtime.app.
Private Key: Generate a private key that can be used for the AppAttest service and provide the file with the
.p8extension to adjoe. You can find the instruction on how to get the.p8here. Only the DeviceCheck/AppAttest Service should be added.

Key ID: Generate a key identifier associated with the enabled service.
App ID: Provide the App ID, which contains the Team ID and the Bundle ID separated with a dot, for example:
M4CAP9HPPJ.com.my.app. You can learn more about the app ID here.
Make sure that after you add the capability to your project, you can see the .entitlements file. Specify the production environment.
Do not use the same credentials, i.e., team ID, with device check for your own app. adjoe should be the only one using the AppAttest / DeviceCheck service with your team ID.

Part 3: Terms and Conditions
As a Playtime Studio Partner, the expectation is that adjoe's Terms and Conditions are included within the partner's own T&C. You must update your sign-in and add in adjoe's T&C.
Part 4: App Tracking (iOS Only)
While the IDFA parameter is not required, we strongly recommend including it. It's purpose is to help attribute installs and ensure that users are rewarded.
The App Tracking Transparency popup should be triggered in the app before showing games to users. The user must then "Allow" tracking. The Playtime SDK accesses the IDFA via Apple's API.
Last updated