Get Started
Last updated
Last updated
Current version: v3.0.0. View Changelog and Migration Guide.
Follow this guide to configure your app to work with the Playtime SDK using any of our supported wrappers.
Contact your Account Manager to get an SDK hash for your app. Or if you already have access, it can be retrieved from the Publisher Dashboard.
The SDK hash is a unique 32-character code that uniquely identifies your app within adjoe's systems. Each app receives a distinct hash. Remember to keep your hash confidential to prevent unauthorized use.
Important: Execute this step before the Playtime SDK is accessed on the device for the first time! You can always add more test devices, but only if the SDK hasn't been accessed on them yet.
To fully test the Playtime SDK integration and access all campaign types, configure your physical devices and emulators as test devices. Without this step, the types of available campaigns you get will be limited when using VPNs or emulators.
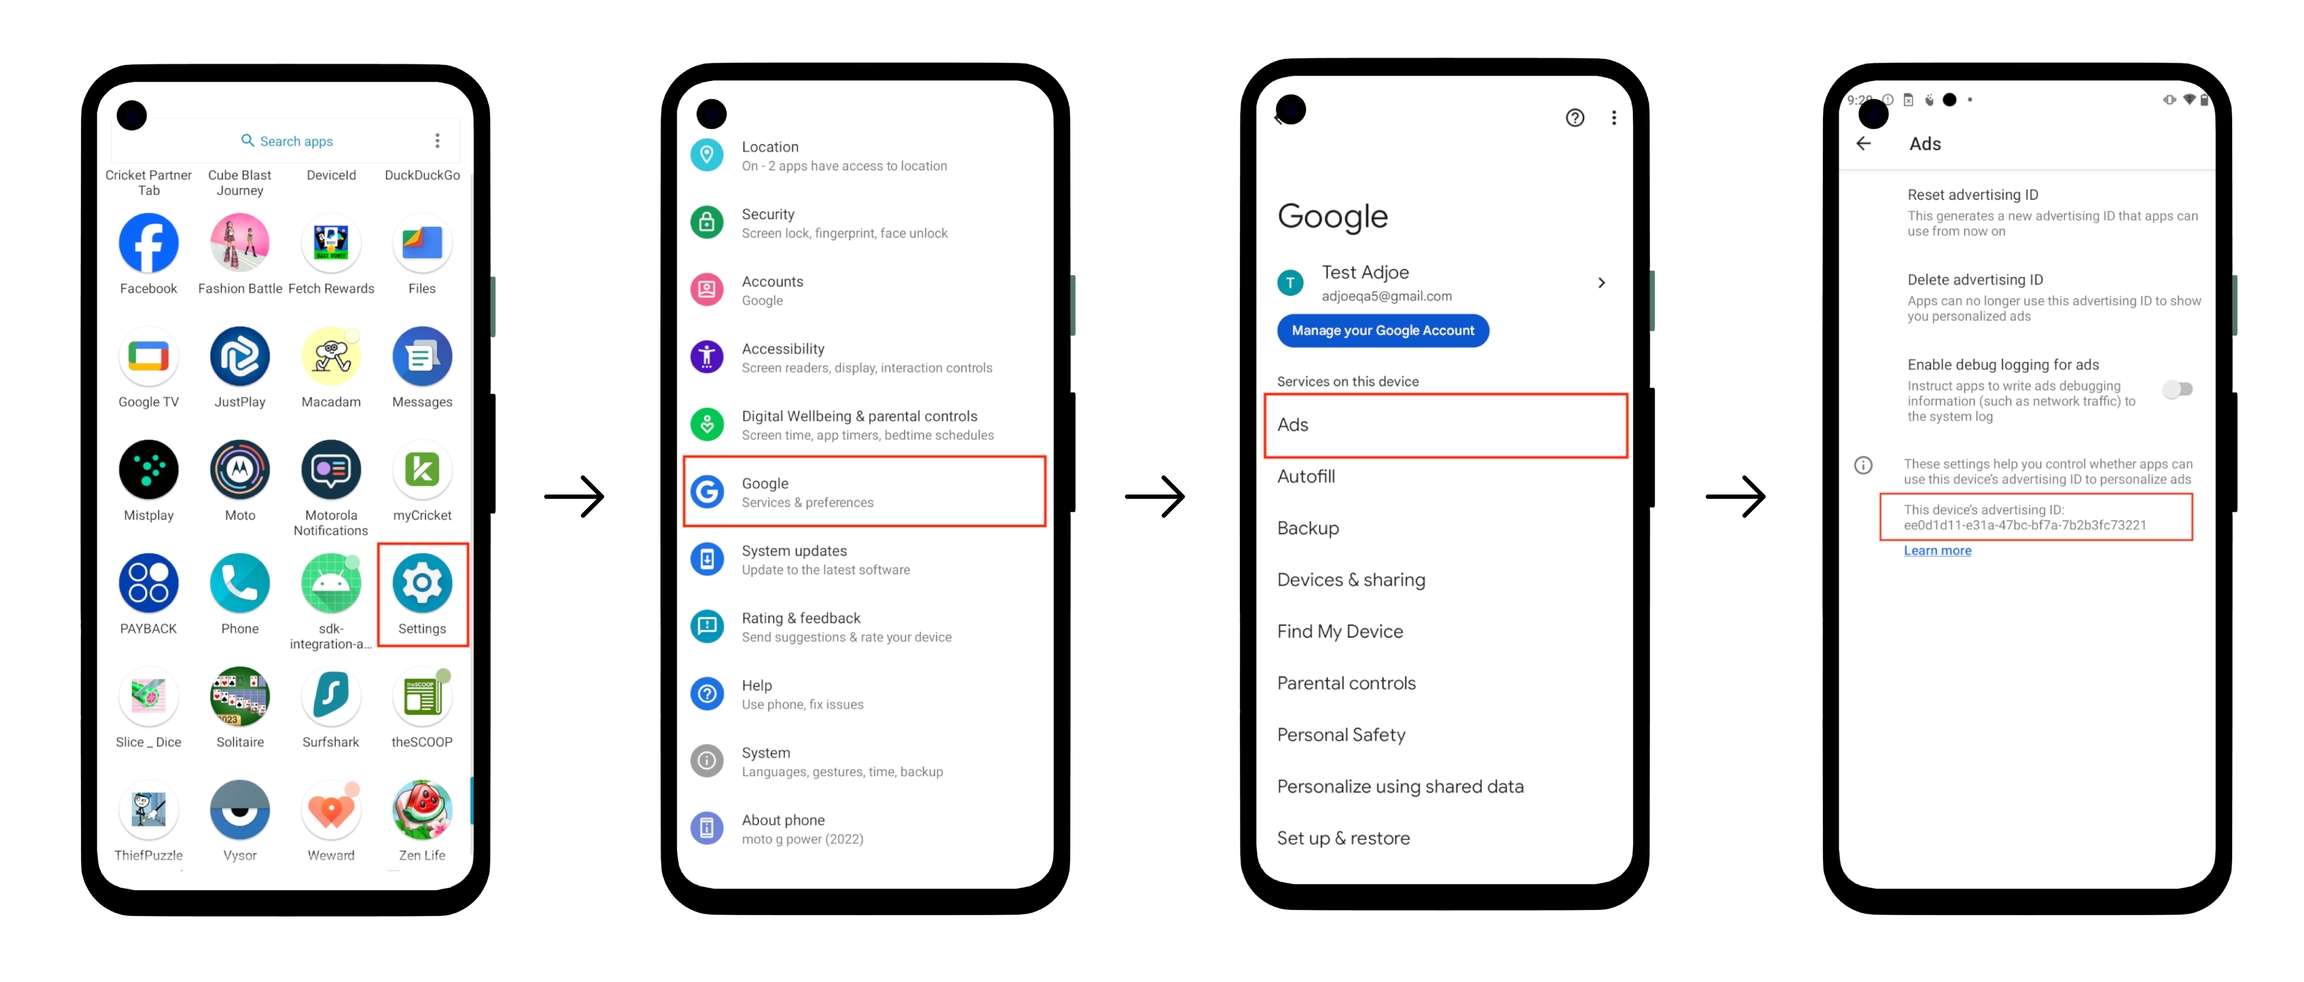
Find Your GAID (Google Advertising ID):
Open the Settings app or Google settings (depends on your device).
Go to "Google" > "Ads" in the Services section.
Your GAID is displayed at the bottom.
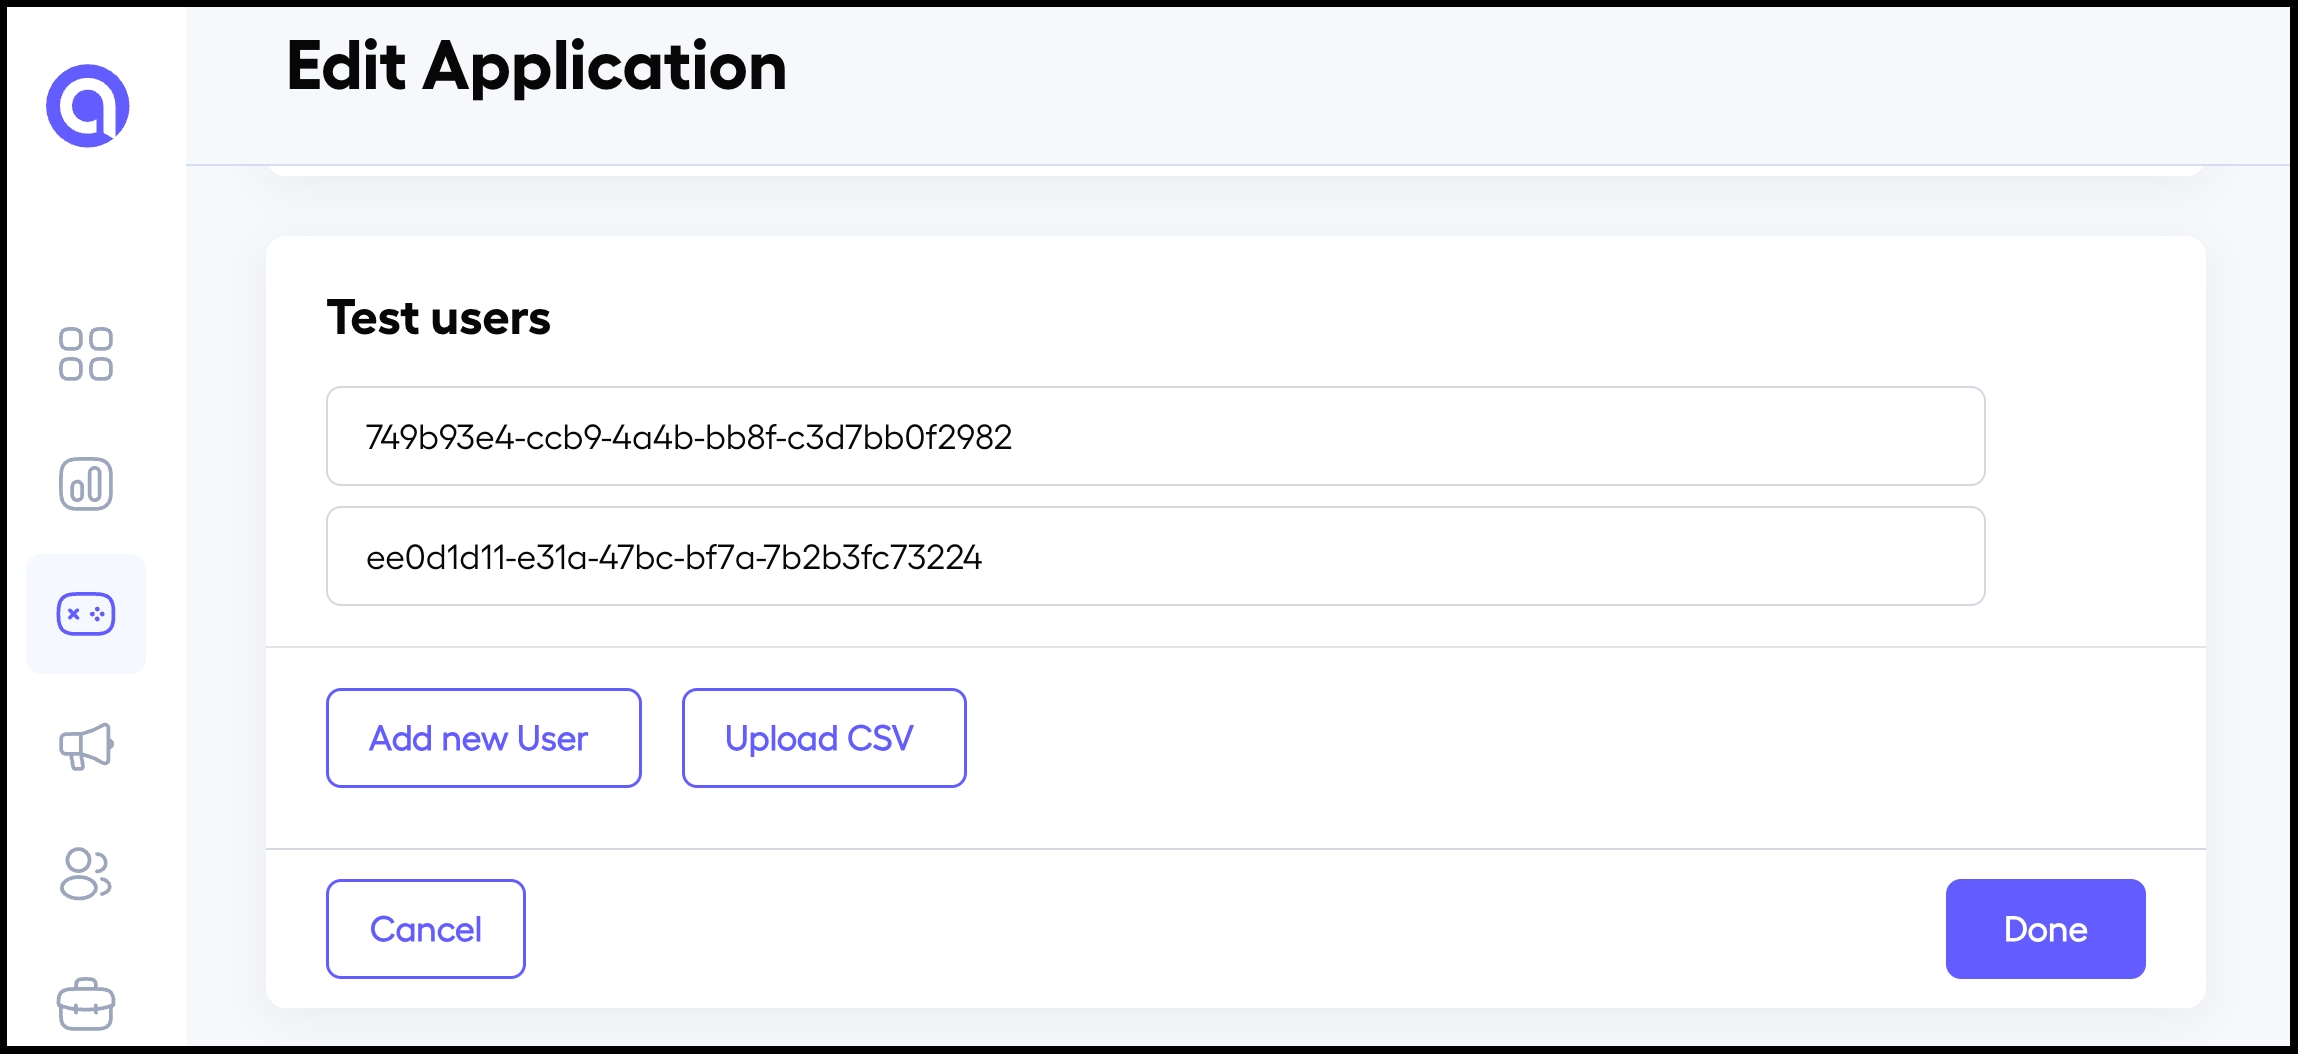
Register as a Test User:
With your GAID, go to the Publisher Dashboard. If you don't have dashboard access, contact your Account Manager.
In the dashboard, find "Test Users" under configuration settings and enter your GAID.
Please note: If you reset your device's GAID, remember to update the test device information in the dashboard with the new GAID before accessing the Playtime SDK again.
Add adjoe's repository to your root build.gradle (project level):
Add the adjoe dependency to your app's build.gradle (module level):
If you use Kotlin DSL for adding dependencies, add the repo in the settings.gradle.kts
You have an option to integrate the dependencies via Groovy or Kotlin. To understand the differences of integrating dependencies via these platforms, refer to the official Android docs.
Enabling logging per device within the SDK is crucial for troubleshooting. Turn on logging and include the logs with any bug reports to help us accurately replicate and address issues.
Here’s how to enable logging:
Connect the device to your computer and enable ADB.
In a terminal window, run the following command to activate logging:
You can now filter LogCat using the Playtime tag to monitor relevant log output. If you wish to disable logging, simply execute the command:
This sets the logging level to ERROR, effectively reducing the verbosity of the logs.